DIY Beeswax wraps
We are proud to be a gladwrap free household and have been for over a year. I have been making and using beeswax wraps for a few years now and they are a great alternative to gladwrap. They can be used for wrapping your sandwiches for lunch and storing cheese or covering bowls in the fridge. They are quite expensive to buy but so easy to make and you only need a small amount of equipment and a standard kitchen oven to make your own. One word of caution, don’t make them on a warm day with the windows and doors open or you will end up with a house full of bees! They also make great gifts. I can get approx 6 wraps from one block of beeswax (70g) depending on the size of the wrap.
You will need the following equipment:
A cheese grater (one that you will only use for grating beeswax, I got mine for 50c at the Op shop)
a small paintbrush (you can pick them up cheaply at Bunnings or Mitre 10)
beeswax blocks (I get mine here as this is the best value I have found in NZ)
-
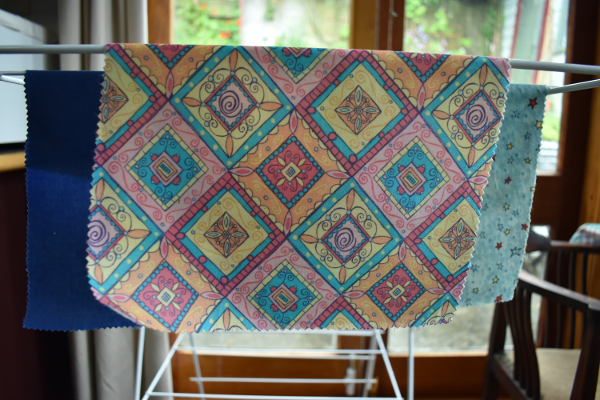
 100% cotton fabric that has been washed and cut to size (great for using up any scraps you have)
- an oven tray
tinfoil
First you will need to preheat your oven to about 130ºC and grab an oven tray and cover it with tinfoil. Then cut your fabric to the size you require. If you have pinking shears, use these as it stops the edge of your wrap fraying and gives it a nice finish

Next grate your beeswax. I grate mine onto a piece of baking paper as it makes it easy to move around and it stops it from sticking to everything (and it is a pain to clean off!)

Place your first piece of fabric onto your oven tray and sprinkle with beeswax. Be conservative to start with as you can always add more if required. You don’t want to overload the fabric.


Place into the oven and keep an eye on it while the wax melts. It shouldn’t take more than 5 mins. Pull the tray out of the oven and use the paintbrush to spread the wax out from the centre of the wrap to the edges. You want the whole wrap to be covered with the melted beeswax. You will notice any bits that haven’t got wax on them as they will be a lighter colour than the rest. Add a bit more wax if necessary and return to the oven.
When you are happy with the coverage, remove from the tray and hang on a clothes airer to cool. They only take a couple of minutes to set.
Repeat for each piece of fabric. If you find that you have put too much wax onto a piece, lay another wrap over the top and brush with your paintbrush and the excess wax will soak into the next wrap. Your whole house will smell wonderful!
To use, warm slightly in a pocket or in your hands and mold around whatever it is you are covering. They will keep their shape when they cool. They can be rewaxed or just popping them into the oven again makes them like new and to clean, wipe down with a damp cloth. Totally sustainable, waste free and last for ages.